Secure Proxy
Functional description
The HOOC Secure Proxy Service (SEPROX) enables easy and secure remote access to devices and websites in remote networks. The access can be established via any web browser and supports the following protocols: HTTP, HTTPS, SSH, VNC and TCP.
For HTTP, HTTPS, SSH and VNC protocols, a unique weblink is created with which you can access your devices via web browser (i.e. without an additional app).
When using the TCP protocol, access will be established by means of a permalink.
Configuration
The SEPROX service can be configured under the specific site(s) then Services -> Secure Proxy.

By clicking on the icon, the service IP address can be set. Furthermore, by clicking on the icon, you can check if the given service IP address is not already in use.
Service IP address
In order to use the Secure Proxy, the service must first be set up once. This requires a service IP address. Please note that:
- The IP address 172.17.17.21 is used as the standard service IP address.
- The service IP address cannot be in the 10.42.0.0/16 subnet.
- It must be ensured that the IP address in the remote network is free and will also not be used in the future.
For verification, a ping test can be performed on an IP address by clicking on the icon.
Create DNS records
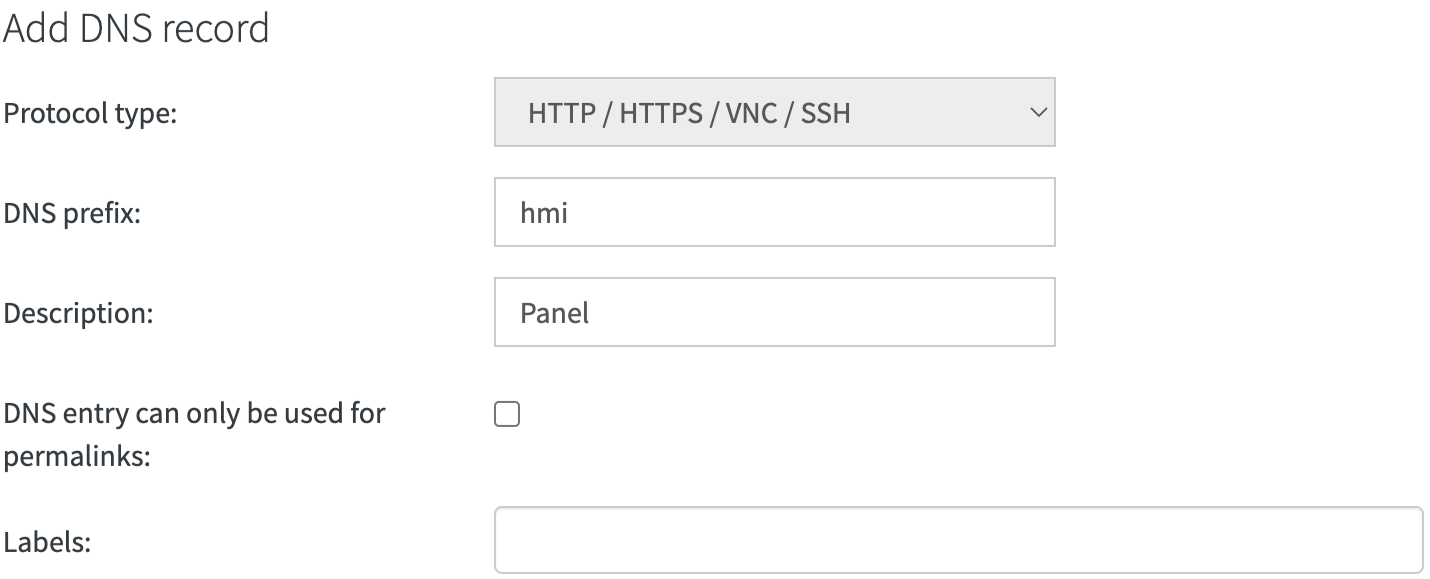
By clicking on the icon, a new DNS record can be added. The DNS record is a part of the specific Secure Proxy URL. Devices and permalinks are assigned to this record. Please note that for the parameter DNS prefix, you can use no uppercase (capital) letters and special characters.

| Property | Description |
|---|---|
| DNS prefix | Enter the specific name of the DNS prefix. |
| Description | Enter the name, description or paraphrase of the record. |
| DNS entry can only be used for permalinks | If set, mappings created for end devices can only be accessed via the permalink. |
Protocol-specific parameters
Protocol type TCP
| Property | Description |
|---|---|
| IP address / hostname device | Enter the IP address or hostname (*.local) of the TCP device as it is or will be assigned in the remote network (site). |
| Port | Choose 1883 for MQTT. |
| TLS | Connection to end device is encrypted |
| UDP | Connection to end device by UDP |
Actions
After a mapping has been successfully created, the DNS record can be edited by clicking on the icon. The number of assigned devices and permalinks are displayed in the overview table.

Add device
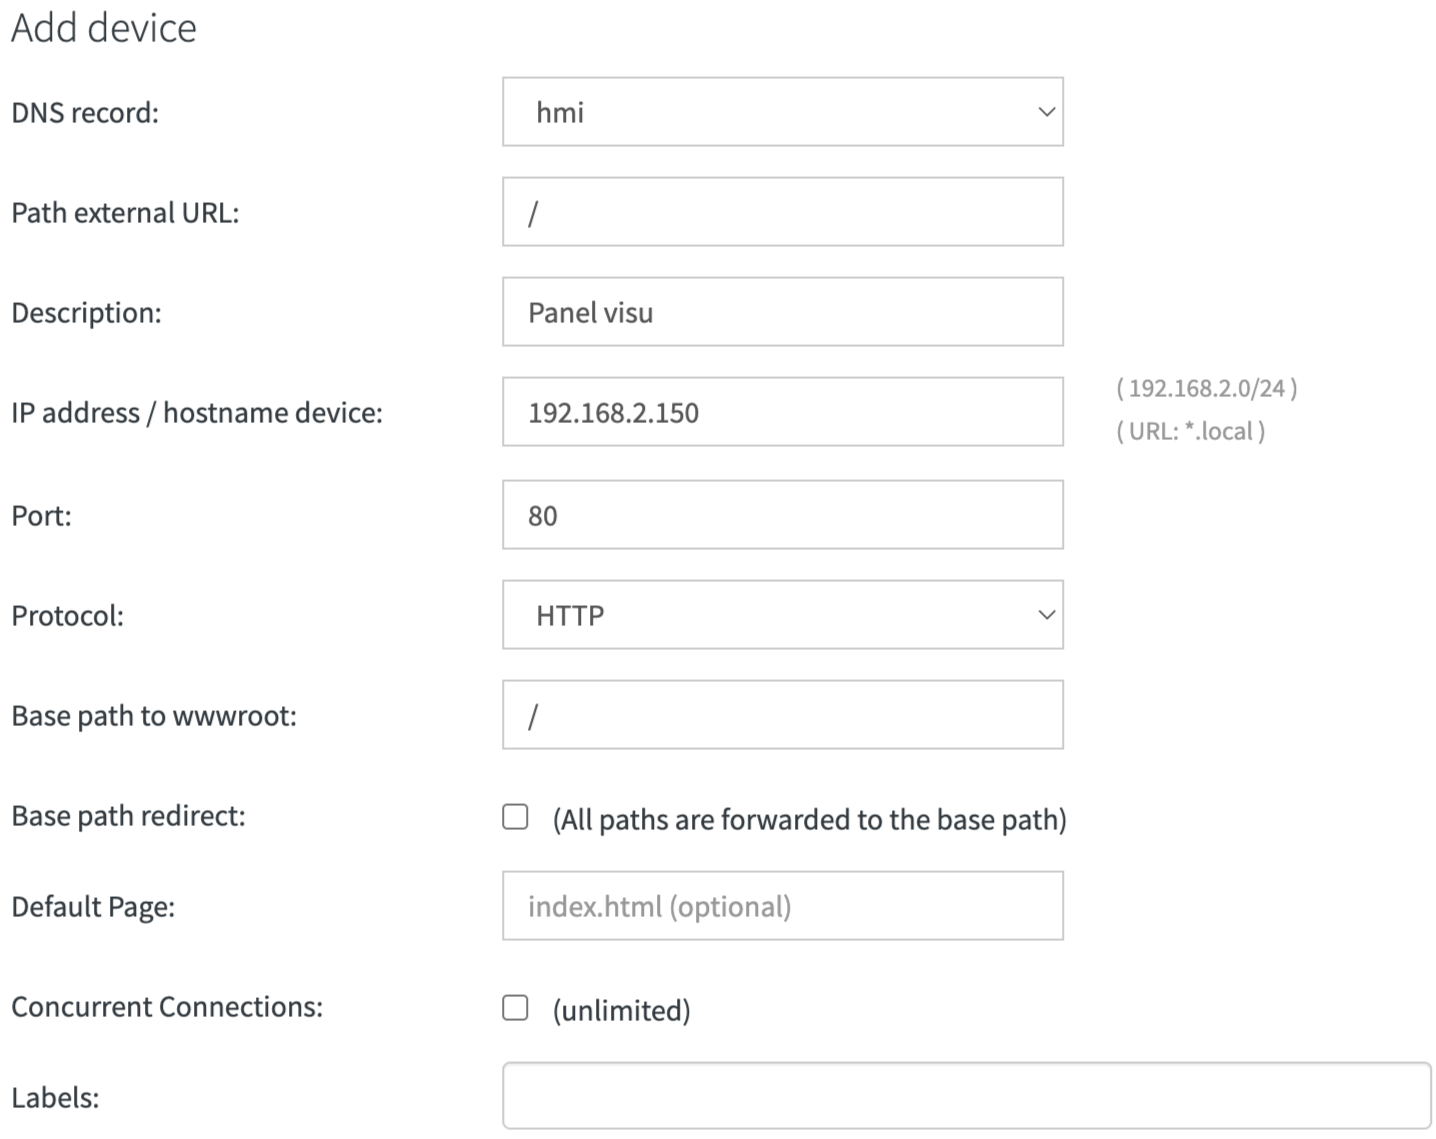
By clicking on the icon, a new device can be set up or assigned to an established DNS record. The protocol-specific settings are specified further below.

| Property | Description |
|---|---|
| DNS record | Enter the assigned DNS record. (Important: This entry cannot be edited after its creation.) |
| Path external URL | Enter the path of the Secure Proxy URL (for the redirection to the device). |
| Description | Enter the name or a short description. This name will also then be displayed in the HOOC app. |
| IP Address / hostname device | Enter the IP address or hostname (*.local) of the device as it is or will be assigned in the remote network. |
| Port | When entering the port, please note that 80 for standard web pages, 443 for encrypted web pages, 5900 for VNC and 22 for SSH. |
| Protocol | Select the communication protocol |
Protocol-specific parameters
HTTP/HTTPS
| Property | Description |
|---|---|
| Base path to wwwroot | If the default web page is located in a specific path, it can be defined here. |
| Base path redirect | If this option is activated, only the Secure Proxy link will be redirected to the base path. If this option is not activated, all paths will be redirected to the base path. |
| Default page | If no index.html is available, you can enter here the name of the start page (optional). |
| Concurrent connections | Please note that some web servers support only a limited number of concurrent connections or requests. |
VNC
| Property | Description |
|---|---|
| Connection settings | Select your option: (Automatic or not) connection to VNC server |
| Username | Optionally, enter a VNC username. If available, the input is taken into account for plain authentication methods*. |
| Password | Optionally, enter a VNC password. If available, the input is taken into account for plain and vnc auth authentication methods*. |
| Resize | Select scale |
| Cursor | Select your option: Whether a dot is displayed (or not), when there is no cursor |
*Supported authentication methods: none, vnc auth, plain, x509 none, x509 vnc auth, x509 plain, RBF 3.3 none, RBF 3.3 vnc auth
Actions
Once mapping has been successfully created, the device can be accessed by clicking on the icon, provided that the option DNS entry can only be used for permalinks is not set in the linked DNS entry.

| Actions | Description |
|---|---|
| Open the URL of the mapping in a new tab | |
| View the URL of the mapping, e.g. to bookmark it | |
| Edit the device mapping | |
| Execute ping to device | |
| Remove device mapping |
Add permalinks
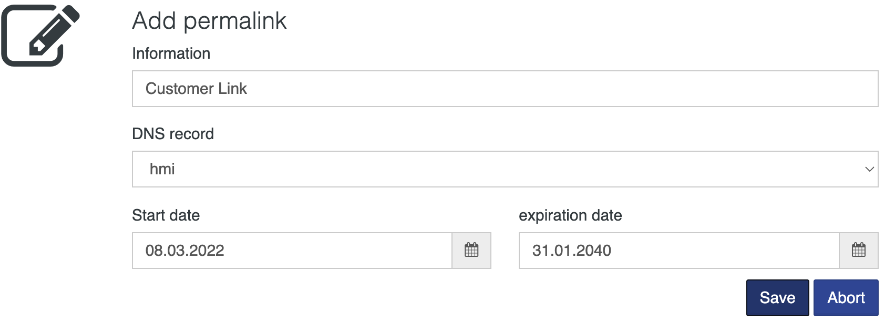
You can use a permalink in order to access a previously created DNS record. In this way, you will receive direct access to your devices, without the need of entering further authentication. In order to create a new permalink, click on the icon.

| Property | Description |
|---|---|
| Information | Enter a name for the permalink (e.g. the name of the customer who will use this permalink). |
| DNS record | Enter the assigned DNS record. |
| Start date | Set the date, from which on the permalink may be used. |
| Expiration date | Set the date, until which the permalink may be used. |
| Authorization token | BFor DNS records of type “http/https,” an authorization token can be used to secure the permalink. This authorization token must be specified in the HTTP header X-HOOC-SeProx-Permalink-AuthToken when sending a request. |
| Go list IP addresses | Option to limit up to 4 IP addresses. |
As soon as the permalink has been created, a dialog box will open with the permalink URL and the authorization token (optional). These parameters should now be copied, as they will no longer be displayed after closing the dialog box.
In case you have assigned multiple devices to a DNS record, you can access them with the appropriate extension (see path external URL).
Actions
A permalink can be removed by clicking on the icon. If you only want to deactivate the permalink temporarily, click on the icon. The Go-List IP addresses can be changed by clicking on the icon.

Branding
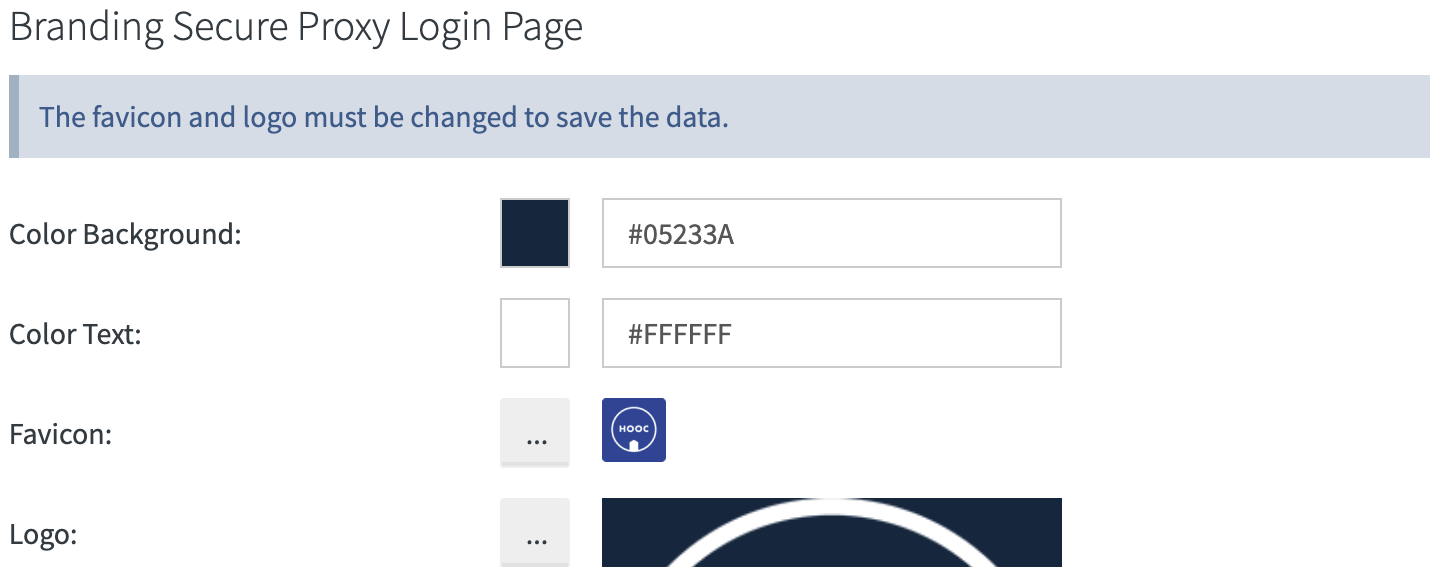
When you open the SEPROX link, you will be redirected to the HOOC login page for authentication. By default, this web page is displayed in the HOOC look and feel. However, by clicking on the icon, you can define your own colors and logos for this website.

Use in the HOOC apps
Your devices are listed in your HOOC app.