Alarm Server
Functional description
As part of the HOOC alert solution, the Alarm Server service enables you to define specific alarm rules for your system monitoring and the notification in case of a system failure. If you wish, you can also combine different other HOOC services with the Alarm Server service. For example: You might want to be alerted if the values sent from the Remote Control Service (SERC) are too high/low. Or you want to be informed when the Remote Access (SERA) detects an (un-)authorized person accessing your system.
With the Alarm Server service, you can also combine different alarm rules and conditions (e.g. when heating on, but temperature too low –> send alarm). You also have the possibility to test those alarm rules and conditions beforehand (see next point).
Please note that the alarm notification channels (voice message, push, SMS or e-mail) have to be configured in the HOOC Notification Center (see next chapter).
Alarm rules configuration
The alarming service can be configured under the specific Site(s), then Additional Services –> Alarm Server.

As mentioned above, you can test every alarm rule beforehand. The test result will then be shown in the Last status column. If an alarm value has been defined in the settings, it is also displayed in parentheses (in so far as alert value > 1).
- In order to manually update the alarm rule, click on the icon.
- In order to test the alarm rule (with redirection to the Notification Center), click on the icon.
Depending on the configuration of the rule, the following operations are available:
| Operations | Description |
|---|---|
| Pause the process | |
| Start the process | |
| Send event to Notification Center | |
| Acknowledge the alarm |
The following actions are also available:
| Actions | Description |
|---|---|
| Edit the alarm rule | |
| Copy the alarm rule | |
| Show the alarm log / alarm history | |
| Remove the alarm rule |
Create alarm rules
You can add a new alarm rule by clicking on the icon. The following settings can be made:
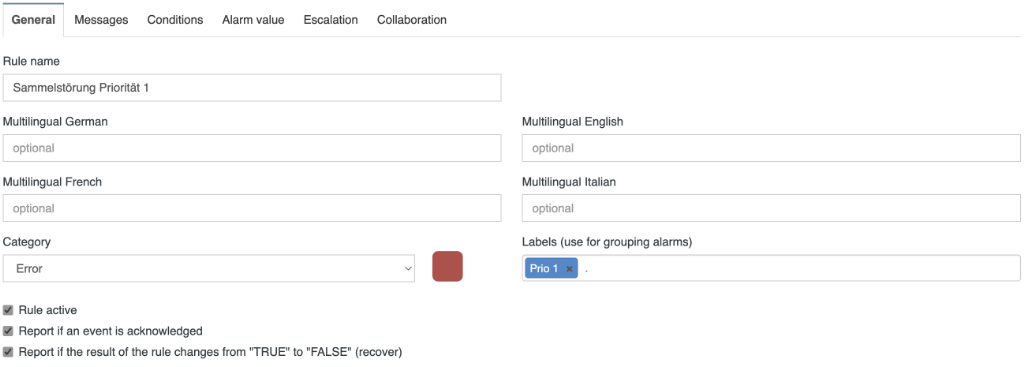
General
| Property | Description |
|---|---|
| Rule name | Specify the alarm rule (the name entered here will also be shown as such in the HOOC apps). |
| Multilingual … | Add the rule name in the corresponding language (optional). The name entered here will be, depending on the language settings, shown as such in the HOOC apps. |
| Category | Categorize the alarm rule (e.g. information, warning, alert etc.) |
| Labels | Labels for grouping alarm rules can be defined. The Notification Centers provide filtering options based on the alarm rule labels. |
| Rule active | Check this field if you want to activate the alarm rule (otherwise the rule is not in force). |
If the option Report if the result of the rule changes … from the general settings is activated, the notification will be sent with the status OK.
Messages
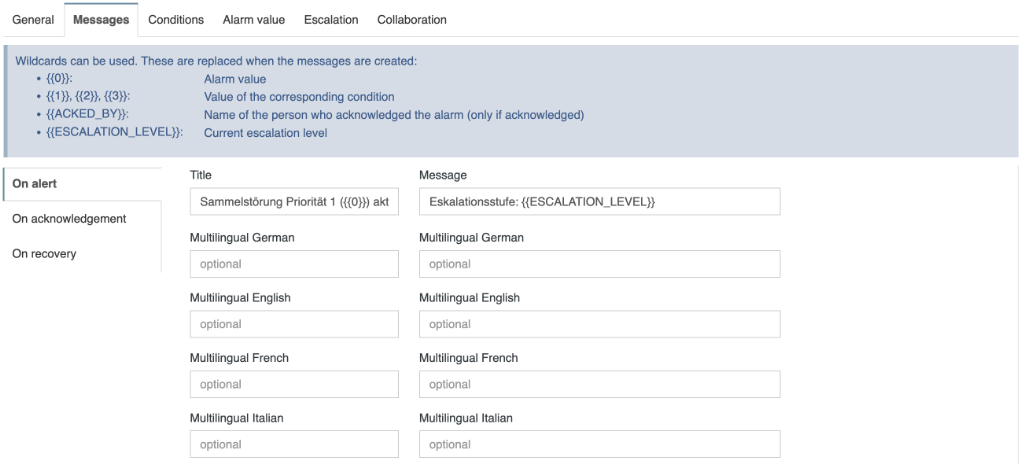
Each alarm message can be assigned a different status (e.g. “on alert”, “on acknowledgement” and “on recovery”).
| Property | Description |
|---|---|
| Title | Enter the title of the message |
| Message | Enter the message text |
| Multilingual … | Enter the translated terms, which, depending on the language settings, will then be used for the alarm message (optional) |
You can also use placeholders or wildcards. These will be replaced by the corresponding values once the message is created.
| Example | Description |
|---|---|
| {{0}} | Stands for the evaluated alert value |
| {{1}}, {{2}}, {{3}} | Stands for the respective value of the alarm condition (see next point) |
| {{ACKED_BY}} | Stands for the name of the person who has acknowledged the alarm |
| {{ESCALATION_LEVEL}} | Represents the current escalation levels |
Conditions
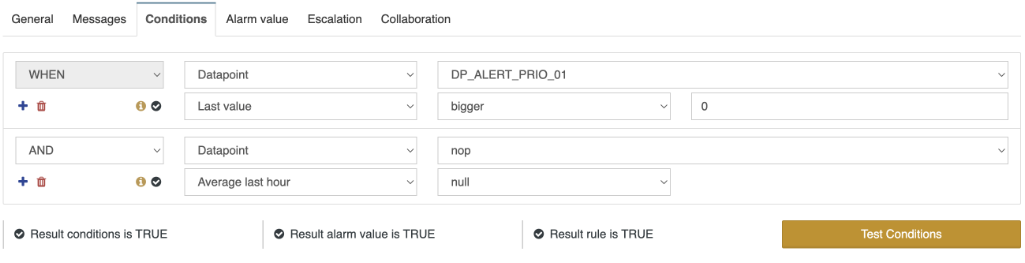
In order to create a rule, you have to specify at least one condition. However, you can also combine several conditions together.
- To add a new condition, click on .
- To delete the condition, click on .
- To move conditions, use “drag and drop”.
Logical operators
The first condition always starts with the operator WHEN. If you opt for multiple conditions, there are several logical operators you can use:
| Logical operator | Description |
|---|---|
| AND | AND operator |
| NAND | NOT-AND operator |
| NOR | NOT-OR operator |
| OR | OR operator |
| XNOR | EXCLUSIVE-NOT-OR operator |
| XOR | EXCLUSIVE-OR logic operator |
Please note that the conditions are to be combined one after the other. Condition_01 is to be combined with Condition_02. This result is then combined with Condition_03 and so on.
Using your HOOC gateway as data source (Remote Access)
If you want to use the HOOC gateway respectively the Remote Access as a data source for your Alarm Server rule, you have different options available. So you can e.g. use the connection status (for a specific time period) as a condition for an alarm rule or the number active of user sessions.
Using a data point as data source (Remote Control)
If you would like to use the data source data point respectively the Remote Control for your Alarm Server rule, you can select the specific data point by drop-down.
Please note that in case the data point name in the Remote Control service is changed, this setting will not automatically be transferred. This can lead to an incorrect result of the corresponding rule.
The conditions terms are described as follows:
| Terms | Description |
|---|---|
| Mean value | Stands for the sum of all measured values during a specific time period divided by the number of measured values of this period (arithmetic mean) |
| Median value | Represents the middle value in distribution when the values are arranged in ascending or descending order. |
| Value validity | Stands for the validity of the measured values. Important: If the data point value of an event-driven protocol (e.g. KNX) is marked as invalid for the entire period (Last known value), the value 0 (out of order) is assigned. |
| Change of value | Checking a change in value over time |
After having selected the query definitions of the data point, you can enter the operator and the corresponding limit values.
For non-event-driven protocols (e.g. Modbus TCP): Please note that if no values of the data point are available, the value null is assigned. For event-driven protocols (e.g. KNX): You can check the validity of the data point with the query definition value validity.
Using your KNX device as data source (Remote Control)
In order to monitor the connection to your KNX gateway/router or to check the bus load, you want to use the data source KNX device.
Using your LoRa device as data source (Remote Control)
In order to monitor the connection to a specific LoRa device, you want to use the data source LoRa device. Important: If no data could be received from the LoRa device during the predefined time interval, the connection is shown as disconnected.
Relational operators
From the table below, you can see the possible relational (comparison) operators.
| Description | Operation | Information |
|---|---|---|
| equal | applies if (value == field0) | |
| greater | applies if (value > field0) | |
| smaller | applies if (value < field0) | |
| within | applies if ((value >= field0) && (value <= field1)) | |
| outside | applies if ((value < field0) && (value > field1)) | |
| null | applies if (value == null) | applies if there is no value available |
| only bits | applies if ((value > 0) && ((value & bitmask) == value)) | If the value is not integer, the result will be FALSE |
| one bit | applies if ((value & bitmask) > 0) | If the value is not integer, the result will be FALSE |
| all bits | applies if ((value & bitmask) == bitmask) | If the value is not integer, the result will be FALSE |
| no bit | Applies if ((value & bitmask) == 0) | If the value is not integer, the result will be FALSE |
Testing the conditions
You can test the conditions of every alarm rule, by clicking on “Test conditions”. The rule will then be tested, without any messages being sent. After the testing, the following results appear:
- The value of the data source is displayed in the tooltip
- Result “condition TRUE“
- Result “condition FALSE“
The result of the rule is displayed to the left of the “Test conditions” button.
Alarm value
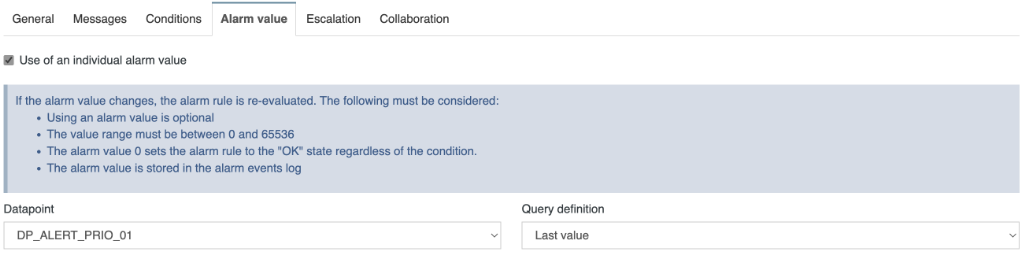
The alarm value is an optional setting. If the alarm value changes, the alarm rule is re-evaluated. The following must be considered:
- The value range of the associated data point is interpreted as UINT (value between 0 and 65536).
- The alarm value 0 sets the alarm rule to the “OK” state regardless of the condition.
- The alarm value is stored in the alarm events log
Escalation
You can assign your escalation rules in the configuration tab Escalation. Escalation rules define the escalation process in case of a technical problem as well as the interval in which the alarm messages will be sent (until the alert will have been acknowledged).
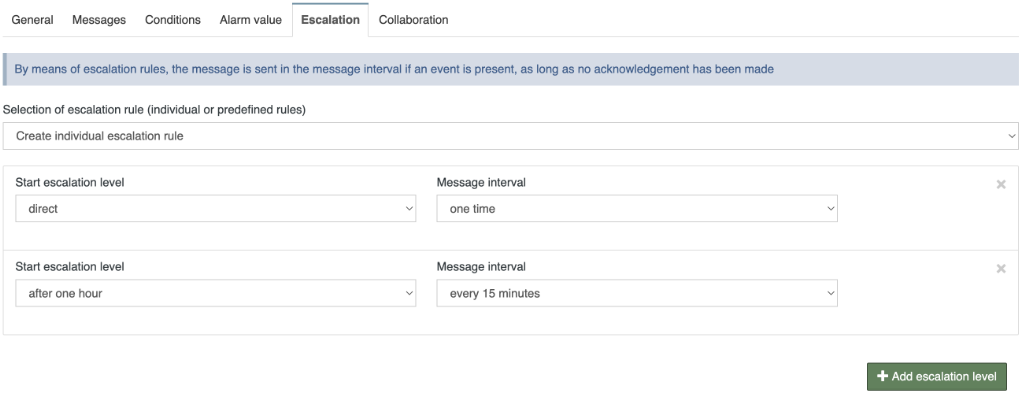
In the dropdown field Selection of escalation rule choose an already defined escalation rule in order to assign it to the alarm rule or choose to enter an individual escalation rule.
Enter an individual escalation rule as follow:
| Property | Description |
|---|---|
| Start escalation level | Time between the start of the previous escalation level and the start of the current one. |
| Message Interval | Select the time interval, in which you want the alarm message to be sent during the current escalation level |
You can acknowledge an event or alarm, by clicking on the icon.
Please note that in case of an event (according to your predefined conditions), the escalation level 0 comes automatically into effect. In case you have predefined specific escalation rules for that event, automatically the escalation level 1 comes into effect. “Automatically” here means; as soon as the first predefined condition occurs.
Escalation rules configuration

Escalation rules define the escalation process in case of a technical problem as well as the interval in which the alarm messages will be sent (until the alert will have been acknowledged). It is possible to record a maximum of 8 escalation levels.
An overview of the configuration is displayed for each of the defined escalation rules and the following actions are available:
| Actions | Description |
|---|---|
| Edit the escalation rule | |
| Copy the escalation rule | |
| Remove the escalation rule |
Create escalation rules
You can add a new escalation rule by clicking on the icon. The following settings can be made:
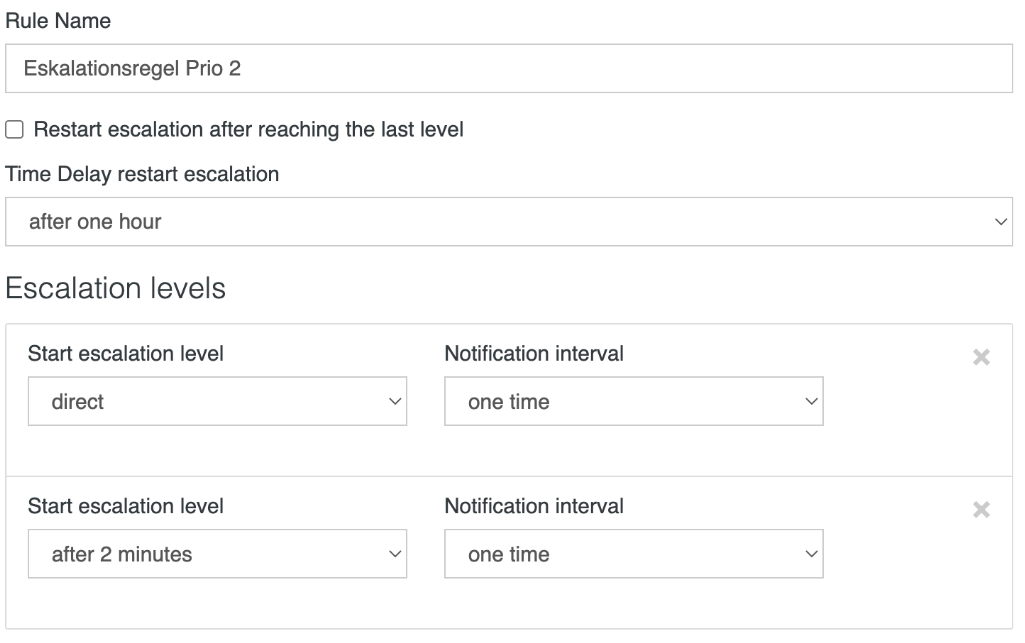
| Property | Description |
|---|---|
| Rule name | Specify the escalation rule name (the name entered here will also be shown as such in the escalation tab of alarm rules apps). |
| Option Restart escalation after reaching the last level | Check this box, if you want that the message(s) to be sent once again to the recipients of the first escalation level, in case no one from the other escalation levels has yet acknowledged the alarm. |
| Time delay restart escalation | Select the time period, in which you want the whole escalation process to be restarted (back to escalation level 1) after the last escalation level has been reached (and has not responded/acknowledged). |
| Start escalation level | Time between the start of the previous escalation level and the start of the current one. |
| Message Interval | Select the time interval, in which you want the alarm message to be sent during the current escalation level |
Use in the HOOC apps
The functionalities of the different communication channels, the settings for receiving notifications and the configuration of the Message Center can all be made in the HOOC apps. Furthermore, the following settings can be made:
- Alarms can be acknowledged in the Alarm Server menu by swiping the corresponding item to the right.
- The settings for the Notification channels options can be made under the specific Site(s) in the More menu.